I’ve owned a Flymo 1200R robotic lawnmower for over a year now. Overall, it’s been a great experience. I’ve picked up a few handy tips and tricks that I would recommend to anyone who is thinking about getting or who has recently purchased this robot lawn mower. Many of these tips will apply to other models too. I’ve also written a detailed review of my experience with this robot lawn mower.
Read The Manual Carefully
The information in the manual is well written and you must follow the instructions very closely to ensure smooth functioning of your new mower. I tried to install my perimeter wire closer to the edge of the lawn than recommended to reduce or eliminate uncut bands at the side of the lawn. Unfortunately, this led to my mower repeatedly falling in the flower beds and resulted in me having to re-lay the entire perimeter wire, doubling the amount of time that I spent on this activity.
Alternate Brand Spares

Flymo spares can be quite pricey. However, the Flymo brand is owned by Husqvarna, and their spare blades, couplers, clamps and perimeter wire are exactly the same as the Flymo branded spares as far as I can tell. I have used both the official spares and the Husqvarna spares, and other than branding, they seem to be identical.
Clean The Mower Regularly

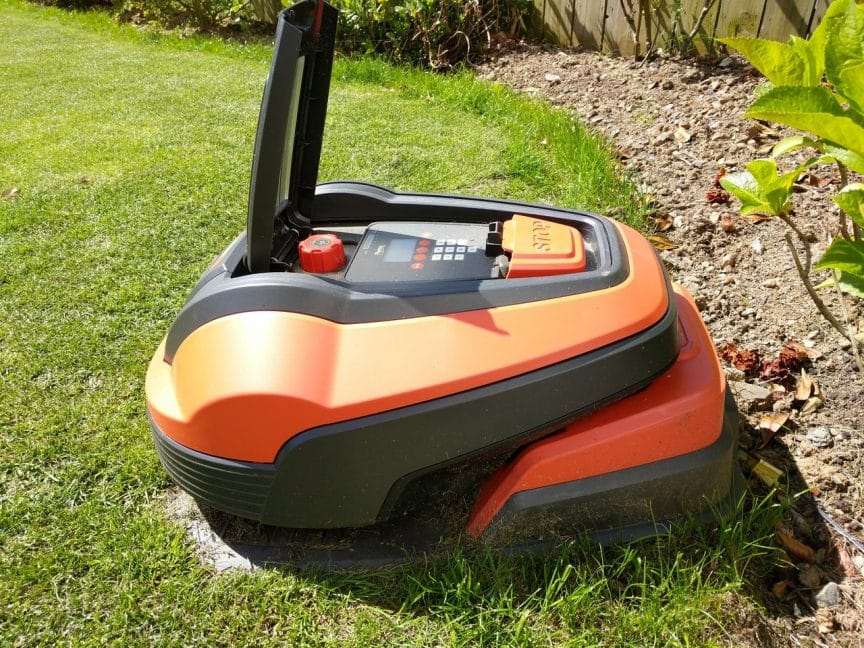
The underside of the mower, and the wheels will pick up grass residue, mud and compacted clippings. In particular, when excess debris is deposited on the wheels, it can reduce the grip of the robot lawn mower, resulting in it being unable to manage slopes or slipping into flower beds if the perimeter wire is set a little too close to the edge of the lawn. A quick clean with a dry brush every few weeks, particularly when conditions are wet, will ensure your mower runs smoothly. As you can see from the image above, I am a little overdue cleaning my mower, and this was also just before I changed the blades. Read more about robot lawn mower maintenance in my article here.
Bury The Boundary Wire
There are two options for laying the boundary wire. You can peg it to the ground so that it is flush with the grass or you can cut a slit in the grass with an edging tool or straight spade and bury the boundary wire up to 20cm deep. Although burying the boundary wire is more time consuming, having tried both, I feel that burying it is by far the better option.
Firstly, it means that you can set the blades of the Flymo 1200R to the desired height immediately, without worrying about cutting the boundary wire.
Secondly, it enables you to aerate or scarify the grass without worrying about cutting the wire.
If you do decide to peg the wire down, the grass will grow over the top of it in a few months. However, in the sections where I did not immediately bury the boundary wire, I could still see bits of exposed wire many months later, and did have one incident where the mower fell into a flower bed and severed the boundary wire that was sitting slightly exposed. Admittedly, it is very easy to splice the boundary wire with one of the connectors, but it would be better if this didn’t happen in the first place.
Ensure That Your Lawn Is Less Than 400 Square Meters
The Flymo 1200R is very competitively priced, but one of the drawbacks is that it is only rated for lawns up to 400 square meters. It would be an expensive error to purchase this and only realise after installation that your garden was too large for it to function properly.
For gardens less that 400 square meters, I would definitely recommend the Flymo 1200R. For larger gardens, I have written a comprehensive guide to picking the best model. This article outlines all of the things to look for in a robot lawn mower. I have provided recommendations for the best models to choose for all sizes of lawns.
Avoid Using The Flymo 1200R When There Is Excessive Debris On The Lawn
The Flymo 1200R will cope with leaves and small twigs on the grass, but in the autumn, or after a storm or very windy weather, it is advisable to ensure that there are no large branches or excessive amounts of leaf litter on the lawn. The flymo may get stuck on some of this, or it may suffer accelerated wear, particularly on the blades, cutting disc and wheels. I have not found this to be an issue on more that 2-3 days in the year. Normally a quick check of the lawn and removal of larger sticks, pine cones and excess leaf litter is all that is required.
You Can Use It If Your Lawn Is Split Into Two Sections
If you have a lawn that is split into two sections, you can still use the Flymo 1200R. There are several options. One is to designate one area of grass as the primary area and install the charging station here.
Lay the perimeter wire in a continuous loop around both sections of lawn, connecting the two sections of lawn together with the outward and inward wire placed together so the signal cancels. Your Flymo 1200R will then have a complete loop of wire around each section of lawn, connected and powered by the charging station.
The Flymo 1200R will autonomously cut and charge in the primary section of lawn, but when you want the other section of grass to be cut, you set the robot lawnmower to manual mode and physically lift it onto the secondary area of lawn. Under manual mode, the Flymo 1200R will mow until it runs out of battery charge, at which point, you can manually transport it back to the charging station.
Alternatively, you can purchase a second charging station, and install one on each section of grass. You can move the Flymo 1200R from one section to the other every few days and it will automatically mow whichever area of grass it is in with no other human input.
A third option, is where you have a flat section of path connecting two areas of grass. You could run the boundary wire along the path so that the mower can automatically transfer between the two sections of grass. You could lift the paving and run the boundary wire under the paving, or fix it to the section of path with a cable cover. This would allow the mower to work completely autonomously, with no human intervention once the initial setup has been completed.
Consider Adding A Brick Or Wooden Border To Your Lawn To Ensure Entire Lawn Is Cut

One of the downsides of the Flymo 1200R is that for lawns that are adjacent to flower beds, you must place the boundary wire 20cm from the edge of the lawn, so that the lawnmower does not fall into the flower beds. This results in a strip of approximately 12cm that the Flymo 1200R will not be able to cut.
This means that you must manually trim the edge of your lawn, which does negate some of the benefit of having an automatic robot lawnmower. One idea to solve this problem, would be to install a brick or wooden border to your lawn, which would provide some additional space for the mower, and enable you to place the boundary wire much closer to the edge of the lawn and ensure that the grass is cut right to the edge. Although I have not done this yet, It is something I am keen to do as soon as I have the time.
If you have any questions about your Flymo 1200R, please get in touch via the website contact form. I would be delighted to help. If you want to read more, check out my full review of the Flymo 1200R or my guide to the best robot lawn mowers.